Can Water Damage Your Charger?
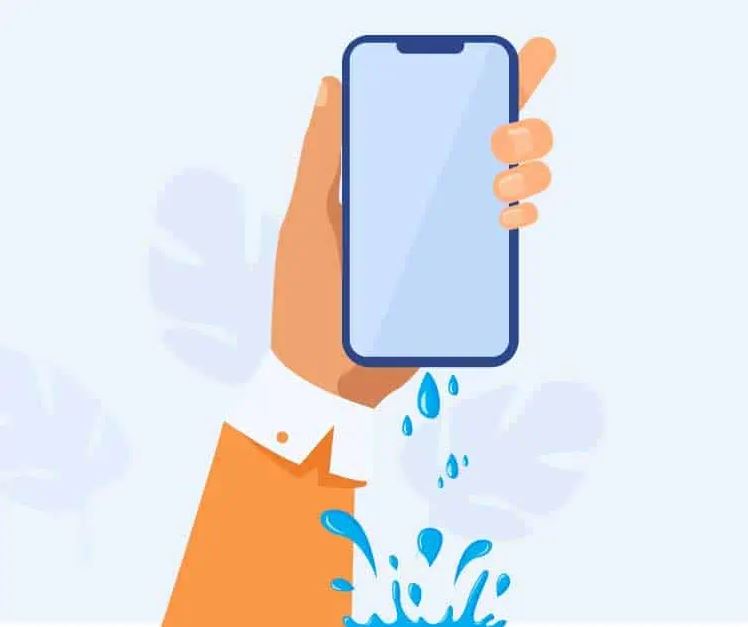
Water damage is one of the most common causes of charger failure. When water gets into your charger, it can cause the electrical components to short out, which can damage the charger and make it unusable.
If you've gotten water in your charger, it's important to take steps to dry it out as quickly as possible. The longer the water sits in the charger, the more damage it can cause.
Here are a few tips on how to get water out of your charger:
- Unplug the charger from the outlet and turn it off.
- Use a cotton swab or a soft cloth to gently wipe away any water from the outside of the charger.
- Place the charger in a warm, dry place. You can also put it in a bag of rice, which will help to absorb the moisture.
- Let the charger dry for at least 24 hours before plugging it back in.
If you've tried these tips and your charger still doesn't work, it's possible that the water damage is too severe. In this case, you'll need to replace the charger.
How to Get Water Out of Your Charger
Water damage is one of the most common causes of charger failure. When water gets into your charger, it can cause the electrical components to short out, which can damage the charger and make it unusable. That's why it's important to know how to get water out of your charger quickly and effectively.
- Unplug the charger: The first step is to unplug the charger from the outlet. This will prevent the water from spreading and damaging other components.
- Dry the outside of the charger: Use a cotton swab or a soft cloth to gently wipe away any water from the outside of the charger. Be sure to get all of the water, even in the small crevices.
- Place the charger in a warm, dry place: Once you've dried the outside of the charger, place it in a warm, dry place. You can also put it in a bag of rice, which will help to absorb the moisture.
- Let the charger dry for at least 24 hours: Before plugging the charger back in, let it dry for at least 24 hours. This will give the water time to evaporate and the charger to dry out completely.
- Test the charger: Once the charger is dry, plug it back in and test it. If the charger is working properly, you're good to go. If the charger is still not working, it may be damaged beyond repair.
By following these steps, you can help to prevent water damage to your charger and keep it working properly for years to come.
Unplug the charger
Unplugging the charger is the first step in getting water out of your charger because it prevents the water from spreading and damaging other components. When water gets into a charger, it can cause the electrical components to short out, which can damage the charger and make it unusable. Unplugging the charger prevents the water from reaching these components and causing damage.
In addition, unplugging the charger prevents the water from spreading to other devices. If the charger is plugged into a power strip, the water could spread to other devices that are plugged into the power strip. Unplugging the charger prevents this from happening.
Unplugging the charger is a simple but important step in getting water out of your charger. By following this step, you can help to prevent damage to your charger and other devices.
Dry the outside of the charger
Drying the outside of the charger is an essential step in the process of getting water out of your charger. When water gets into a charger, it can cause the electrical components to short out, which can damage the charger and make it unusable. Drying the outside of the charger helps to prevent this from happening by removing the water from the surface of the charger.
- Removing water from the surface: The first step in drying the outside of the charger is to remove any water from the surface. This can be done using a cotton swab or a soft cloth. Be sure to get all of the water, even in the small crevices.
- Preventing water from spreading: Drying the outside of the charger also helps to prevent the water from spreading to other parts of the charger. If the water is allowed to spread, it can reach the electrical components and cause damage.
- Protecting the electrical components: Drying the outside of the charger helps to protect the electrical components from water damage. The electrical components are very sensitive to water, and even a small amount of water can cause damage.
- Ensuring the charger's functionality: Drying the outside of the charger helps to ensure that the charger will continue to function properly. If the charger is not dried properly, it may not work properly or it may even be damaged.
By following these steps, you can help to dry the outside of your charger and prevent water damage. This will help to ensure that your charger continues to function properly for years to come.
Place the charger in a warm, dry place
Placing the charger in a warm, dry place is an essential step in the process of getting water out of your charger. When water gets into a charger, it can cause the electrical components to short out, which can damage the charger and make it unusable. Placing the charger in a warm, dry place helps to prevent this from happening by evaporating the water from the charger.
- Evaporation: Evaporation is the process by which water changes from a liquid to a gas. When the charger is placed in a warm, dry place, the water on the charger will evaporate and turn into water vapor. This water vapor will then escape from the charger, leaving the charger dry.
- Absorption: If you place the charger in a bag of rice, the rice will help to absorb the moisture from the charger. Rice is a hygroscopic material, which means that it absorbs water from the air. This will help to speed up the drying process and ensure that the charger is completely dry.
By following these steps, you can help to dry your charger and prevent water damage. This will help to ensure that your charger continues to function properly for years to come.
Let the charger dry for at least 24 hours
Letting the charger dry for at least 24 hours is an essential step in the process of getting water out of your charger. When water gets into a charger, it can cause the electrical components to short out, which can damage the charger and make it unusable. Letting the charger dry for 24 hours gives the water time to evaporate and the charger to dry out completely. This helps to prevent water damage and ensures that the charger will continue to function properly.
In addition, letting the charger dry for 24 hours helps to prevent the spread of water damage. If the charger is plugged back in before it is completely dry, the water can spread to other components of the charger and cause further damage. Letting the charger dry for 24 hours helps to prevent this from happening.
Finally, letting the charger dry for 24 hours helps to ensure that the charger is safe to use. If the charger is plugged back in before it is completely dry, there is a risk of electrical shock. Letting the charger dry for 24 hours helps to prevent this from happening and ensures that the charger is safe to use.
By following these steps, you can help to prevent water damage to your charger and ensure that it continues to function properly for years to come.
Test the charger
Testing the charger is the final step in the process of getting water out of your charger. This step is important because it allows you to verify that the charger is working properly and that it is safe to use.
- Ensuring the charger is working properly: The first reason to test the charger is to ensure that it is working properly. If the charger is not working properly, it may not be able to charge your devices. Testing the charger will help you to identify any problems with the charger so that you can take steps to fix them.
- Preventing further damage: Another reason to test the charger is to prevent further damage. If the charger is still wet, it may be damaged beyond repair. Testing the charger will help you to identify any damage so that you can take steps to prevent further damage.
- Ensuring safety: Finally, testing the charger is important for safety reasons. If the charger is not working properly, it may be a fire hazard. Testing the charger will help you to identify any safety hazards so that you can take steps to eliminate them.
Testing the charger is a simple but important step in the process of getting water out of your charger. By following these steps, you can help to ensure that your charger is working properly, that it is safe to use, and that it will continue to charge your devices for years to come.
FAQs
Getting water in your charger can be a common problem, but it's important to know how to properly remove the water to prevent damage to your charger and devices. Here are some frequently asked questions and answers about how to get water out of your charger:
Question 1: Can water damage my charger?
Answer: Yes, water can damage your charger by causing the electrical components to short out, which can lead to permanent damage.
Question 2: What should I do if I get water in my charger?
Answer: If you get water in your charger, it's important to unplug it immediately to prevent further damage. Then, dry the outside of the charger with a clean cloth and place it in a warm, dry place for at least 24 hours to allow the water to evaporate.
Question 3: Can I use a hairdryer to dry my charger?
Answer: No, it is not recommended to use a hairdryer to dry your charger, as the heat from the hairdryer can damage the charger's internal components.
Question 4: How long should I wait before using my charger after it gets wet?
Answer: It is recommended to wait at least 24 hours after your charger gets wet before using it again. This will ensure that the charger is completely dry and safe to use.
By following these tips, you can help to prevent water damage to your charger and keep it working properly.
If you have any other questions about how to get water out of your charger, please consult the manufacturer's instructions or contact a qualified technician.
Conclusion
Water damage is one of the most common causes of charger failure. By following the steps outlined in this article, you can help to prevent water damage to your charger and keep it working properly for years to come.
Remember, if you get water in your charger, it is important to unplug it immediately and take steps to dry it out. Do not use a hairdryer to dry your charger, as the heat from the hairdryer can damage the charger's internal components. Instead, place the charger in a warm, dry place for at least 24 hours to allow the water to evaporate.
If you have any other questions about how to get water out of your charger, please consult the manufacturer's instructions or contact a qualified technician.